
The Hagia Sophia Dome and the Architecture Behind It
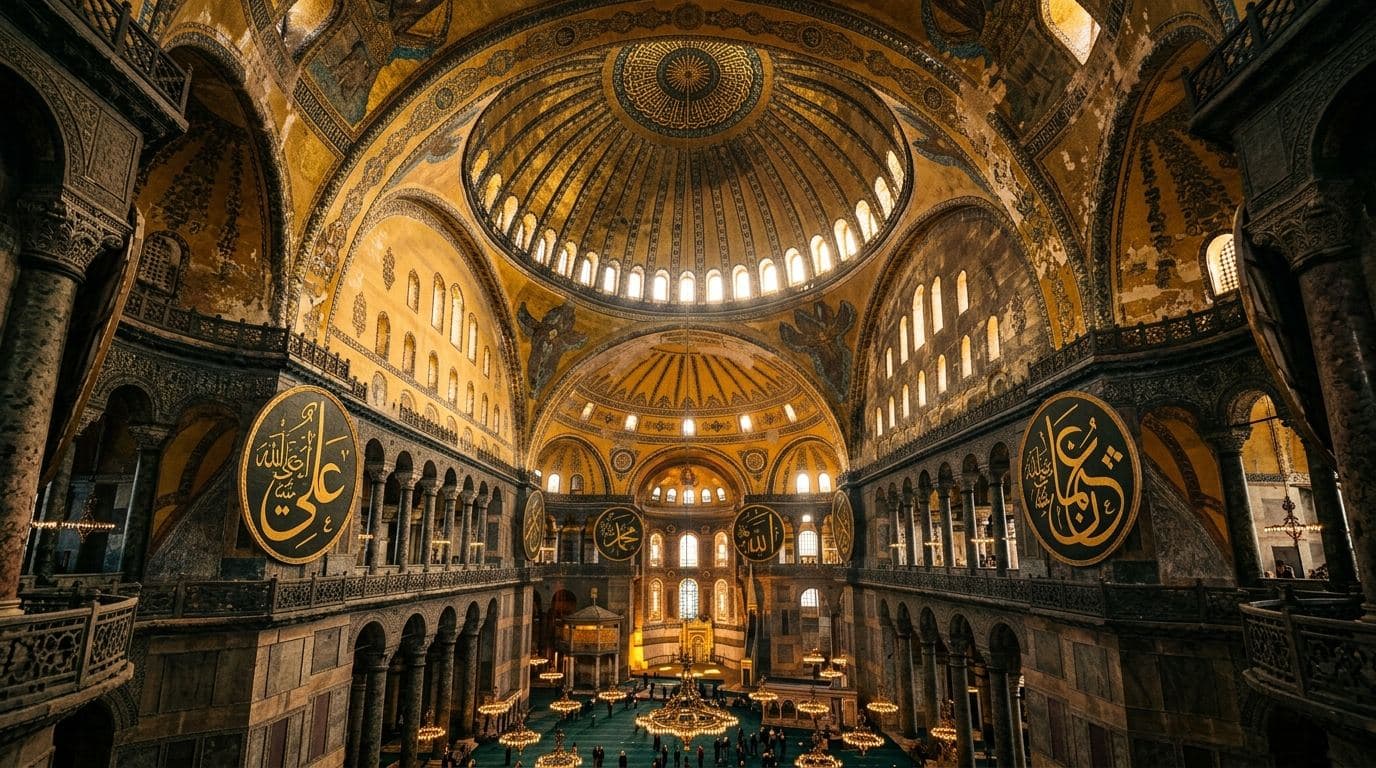
The Hagia Sophia dome stays up because of four pendentives: curved triangles of masonry that catch its weight and pass it down to four massive piers. The dome itself is slightly elliptical, roughly 31 metres across, and its crown floats about 55.6 metres above the floor, higher than a 15-storey building. Worked out in the 530s AD, this piece of Hagia Sophia architecture solved a problem no one had cracked at this scale: how to put a round dome over a square room, and make it look effortless.
That “look effortless” part matters. Plenty of buildings stand up; very few have convinced fifteen centuries of visitors that their roof is hovering. Here’s how the trick works, piece by piece.
The Hagia Sophia Architects: Two Scientists with a Theory
Emperor Justinian I didn’t hire master builders. Anthemius of Tralles was a mathematician, and Isidore of Miletus was a geometer and physicist, and together they treated the commission as an applied-science problem. Construction ran from 532 to 537, an almost reckless five years and ten months for the largest church the world had seen, and the building was inaugurated on 27 December 537. The political backstory, a city in ashes after the Nika Revolt, is covered in our history of Hagia Sophia.
Their credentials weren’t decoration. The geometry below is exactly the kind of thing a 6th-century mathematician would relish.
What Holds the Hagia Sophia Dome Up?
Start with the problem. A dome is round at its base, so it sits happily on a round building, like the Pantheon in Rome. But a church needs a long rectangular hall. Put a circle on top of a square and you get four awkward gaps at the corners.
The pendentive is the answer. Picture four curved, sail-shaped triangles rising from the corners of the square, leaning inward until their top edges merge into a perfect circle. The dome sits on that circle, and the pendentives channel its enormous weight diagonally down into four huge stone piers. Those piers, not the walls, do the real lifting. The walls between them are freed up for arches, galleries and windows, which is why the interior feels so open. When you stand at the gallery rail, look at the corners where the seraphim mosaics are: each angel occupies one pendentive.
Forty Windows and the Floating Effect
Around the base of the dome runs a ring of forty windows, one between each of its forty ribs. Structurally the ribs gather the shell’s forces; visually the windows do something better. Daylight pours through the ring and dissolves the dome’s support in glare, so the eye reads a canopy resting on light. Sixth-century witnesses thought it looked suspended from above, and on a bright morning you’ll see their point.
Semi-Domes: How the Weight Reaches the Ground
The main dome doesn’t act alone. To its east and west sit two semi-domes of nearly the same span, and they perform two jobs at once. They stretch the covered space into the long nave a cathedral needs, and they lean against the central dome like braced shoulders, receiving its outward push and stepping it down through smaller half-domes and arches until the load reaches the ground. Seen in section, the building is a cascade: dome, semi-domes, arches, piers, earth.
The Collapse of 558 and the Steeper Rebuild
The first dome was shallower, and it didn’t last. Earthquakes loosened it, and in 558 a section came down. The rebuild fell to Isidore the Younger, nephew of the original Isidore, who raised the new dome about six metres higher and steeper by 562. A steeper dome pushes outward less, and his profile is essentially what you see today. Parts failed again in 989 and 1346 and were patched each time, so the modern shell blends masonry from the 6th, 10th and 14th centuries. That a 31-metre brick dome from late antiquity is still overhead at all is the quiet miracle of the place.
Marble, Brick and Forgiving Mortar
The materials are half the story. The dome and vaults are brick, laid with notably thick mortar joints that kept the shell light and gave it a little forgiveness when the ground moved. Below, the structure wears gleaming Proconnesian marble, and the sheer variety of coloured stone in the columns and panels was itself a display of imperial reach. Run your eye over the book-matched marble slabs from the gallery; the patterns mirror each other like inkblots.
The Hagia Sophia Floor Plan: Basilica Meets Dome
On paper, the Hagia Sophia floor plan is a hybrid nobody had attempted at this size: a traditional rectangular basilica, with a long nave flanked by aisles and galleries, crossed with a centralised dome hall. You get the processional axis of a Roman basilica and the soaring vertical of a domed shrine in one building. The galleries above the aisles are where today’s visitor route runs, which means you experience the plan the way its builders drew it, from above; our guide to the interior walks that route stop by stop.
Sinan’s Buttresses and a Skyline of Descendants
The Ottomans didn’t just preserve the building; they studied it. In the 16th century the imperial architect Mimar Sinan added the heavy exterior buttresses that still shoulder the dome’s thrust, along with two of the four minarets. And every great Ottoman mosque in Istanbul is, in some sense, a reply to this one: the Blue Mosque across the square makes the comparison unavoidable, and our Hagia Sophia facts roundup collects the numbers behind the rivalry.
Diagrams only go so far, though. Pendentives make sense in about four seconds once you’re standing under them, so when Istanbul is on the calendar, get your Hagia Sophia ticket sorted and see the geometry from the gallery rail.